Affordable inventory management for small businesses
Inventory Count with a Phone
Spreadsheet Data Entry helps you enter data into spreadsheets quickly from your phone: create forms, fill in fields, scan QR codes and barcodes, add photos, and save records to Google Sheets or locally.
When I need to count items at a storage or retail location, I want to scan codes and enter quantities on my phone so that I can see actual stock levels and discrepancies in a spreadsheet.
Spreadsheet Data Entry vs Alternative Ways to Solve This
Alternative
Limitations
Why SDE is better
Manual entry in Excel or Google Sheets
Fast entry from a phone is inconvenient and the risk of mistakes is higher
The form is designed for mobile entry: scan a code and send the record directly to the spreadsheet
Google Forms + Google Sheets
Suitable for simple data collection but not always convenient for frequent repetitive entry
SDE is faster for repeated records: a focused form, number fields, barcode scanning, and automatic submission
Barcode scanning app
It scans the code but does not always provide inventory logic or a structured spreadsheet record
SDE combines scanning, quantity entry, and saving the result to the spreadsheet
Dedicated inventory system
May be excessive in features, setup effort, and cost
SDE is simpler for small tasks: create a form, connect a spreadsheet, and start entering data
Paper list
Data must be transferred manually, and records are easy to lose or enter incorrectly
Data is stored digitally immediately and can be sent directly to the spreadsheet
How to Set Up SDE with Google Sheets
1
Install the app and sign in with Google
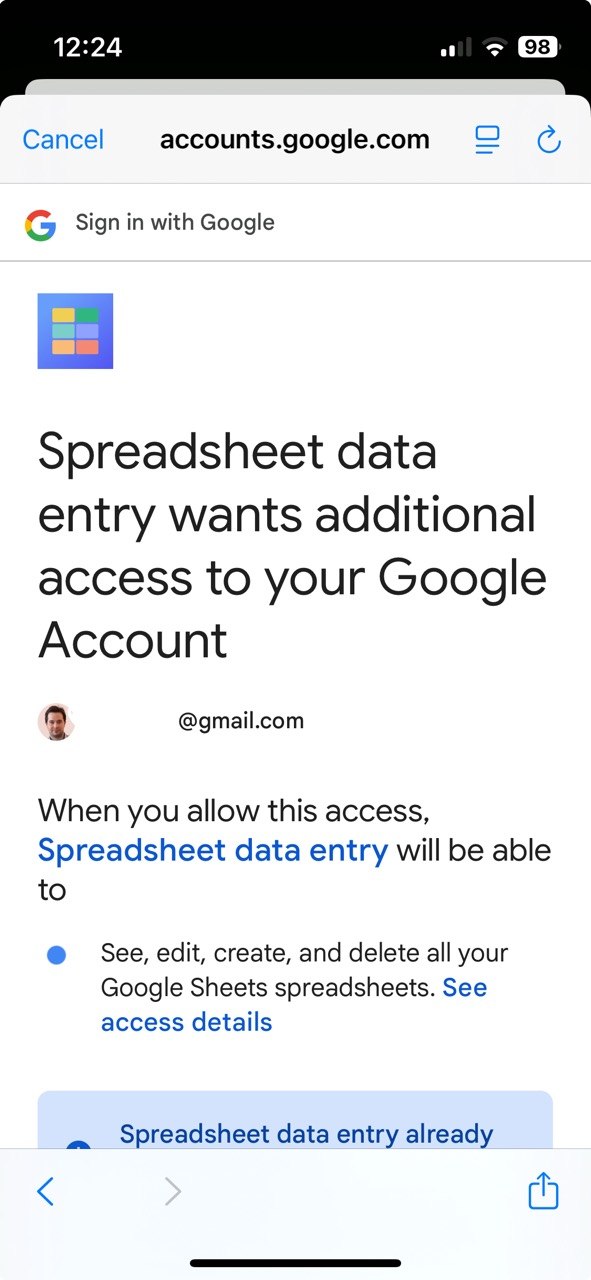
Download SDE, sign in with Google, and grant access to your Google account so the app can work with your Google Sheets.
Install SDE on your smartphone.
Open the app.
Sign in or create an account with Google.
Open Settings.
Connect the Google account you want to use with Google Sheets.
Confirm access.
The app is ready to work with Google Sheets.
2
Create a spreadsheet and connect a form
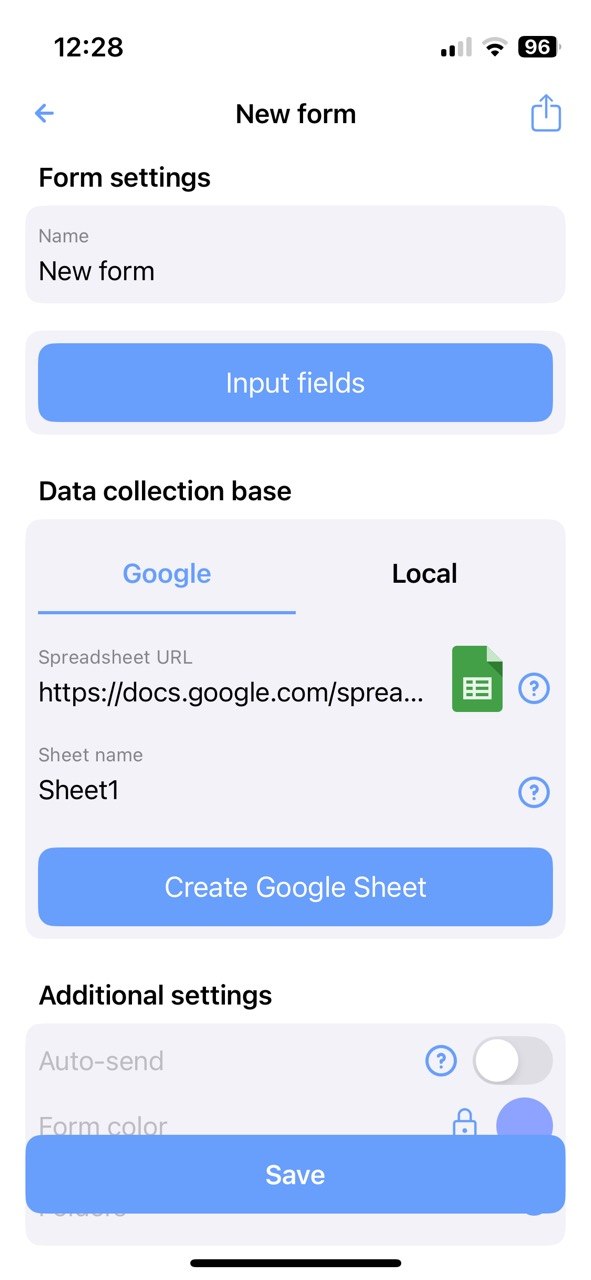
Prepare a Google Sheet and create a new SDE form that will send data to the required worksheet.
Create a Google Sheet.
Add a worksheet for collecting data.
Tap “Create form” in SDE.
Enter the form name.
Select Google Sheets as the storage destination.
Choose the required spreadsheet and worksheet with the assistant, or paste the link manually.
The form is connected to Google Sheets and ready for field configuration.
3
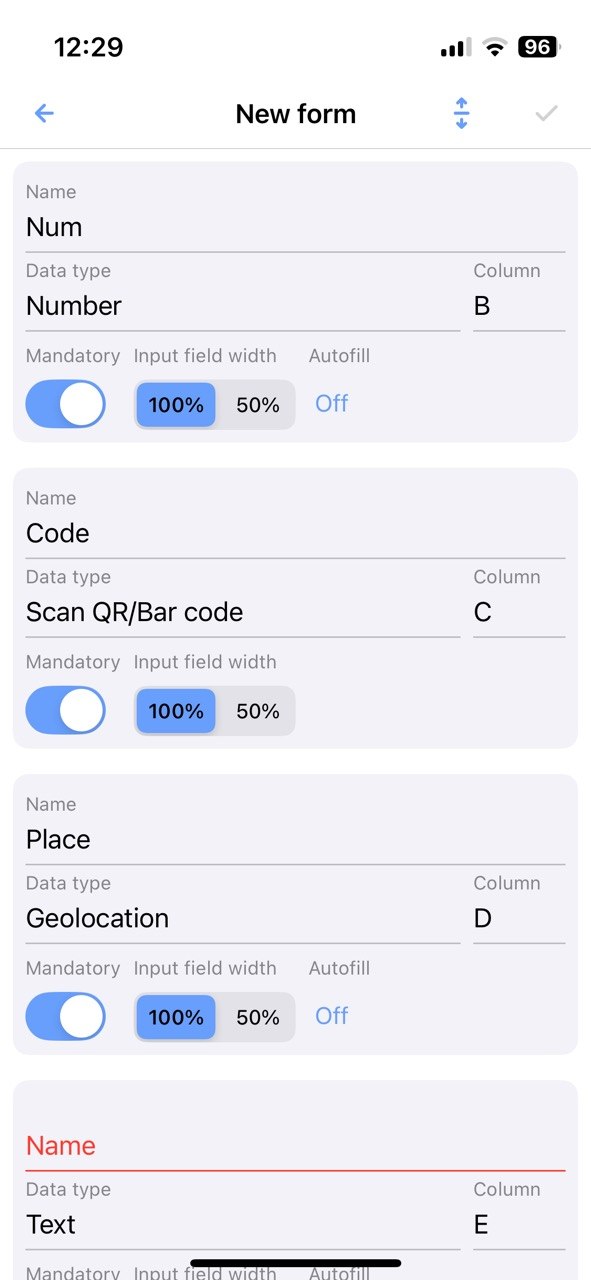
Add form fields and map them to spreadsheet columns
Configure the fields users will complete on their phones and specify which Google Sheets column should store each value.
Open the form field editor.
Add the required fields, such as date, barcode, item name, quantity, and location.
Select the appropriate data type for every field.
Specify the destination column for each field: A, B, C, and so on.
Mark required fields when needed.
Save the form.
The form is fully configured and ready for data entry.
4
Open the form and send data to the spreadsheet
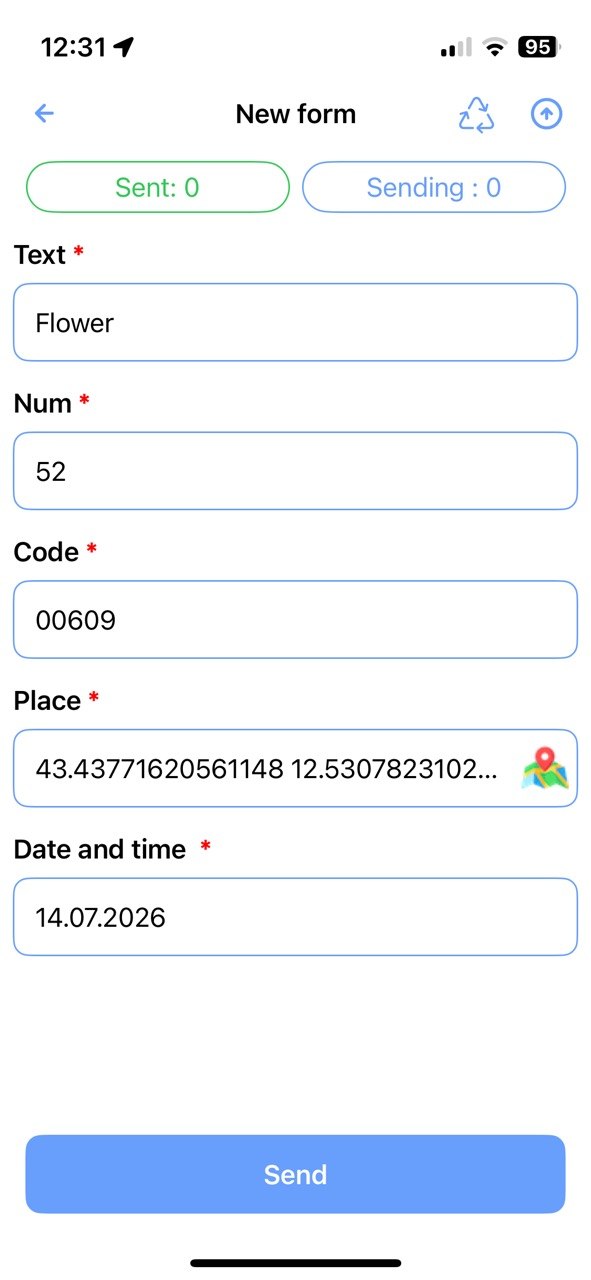
Open the completed form, fill it in on your phone, and send the first record. The data will appear in Google Sheets immediately.
Open the saved form.
Complete the fields or scan a code.
Tap “Submit”.
Wait for the successful submission confirmation.
Open Google Sheets and check the new data row.
The data was submitted successfully and appeared in the spreadsheet.
Template
Ready-to-use Google Sheets inventory template
Copy the ready-made spreadsheet to your Google Drive, connect it to an SDE form, and start entering stock count results from your phone. The template already includes the required columns, formulas, filters, and a sample row.
Count items from your phone and collect the results in one Google Sheet immediately.
Less manual entry — scan barcodes with the camera and enter quantities in a prepared field.
Data is ready for analysis — every record appears in the spreadsheet without re-entering it.
Discrepancies are calculated automatically — actual quantities are compared with recorded stock, and shortages and overages are highlighted.
FAQ
Which fields are needed for an inventory count?
The main fields are date and time, barcode or QR code, item name, actual quantity, and location. You can also add recorded quantity, a comment, and a photo.
How do I map form fields to Google Sheets?
Assign a spreadsheet column to each field: A, B, C, and so on. For example, map the barcode to column B and the actual quantity to column E.
Can I scan barcodes with the phone camera?
Yes. Add a “QR / barcode scanner” field to the form. After scanning, the code appears in the field automatically and is sent to the spreadsheet.
How do I calculate a shortage or overage?
Add the columns “Actual quantity,” “Recorded quantity,” and “Discrepancy.” Calculate the discrepancy with the formula: actual quantity minus recorded quantity.
Can I track multiple warehouses or locations?
Yes. Add a “Location” list field and enter the available storage locations in advance. The user can select the correct location for every submission.
What happens if there is no internet connection during the count?
The record is saved in the queue and sent to Google Sheets automatically when the connection is restored.